Internationale Federn – hier ein Baubericht aus dem IPMS USA Journal von Scott L. Saylor.
If you like roaming the back roads in America, you might come across an old junkyard/gasoline station, or the remnants of one. Many people remember the old family-owned service stations and junkyards along the two-lane roads going through small towns.
I travel the United States as a professional fine arts photographer and seek out these long-forgotten places that have been passed by interstate highways. As a young guy I spent many a day roaming through a junkyard looking for those illusive parts to my 1960 Plymouth. I became familiar with these places and enjoyed seeing the old rusting hulks of cars and trucks that had their own stories to tell.
The junkyards are now sadly left for the ages, stories long forgotten, many gone entirely. I use personal experience as a reference aid to create my dioramas.
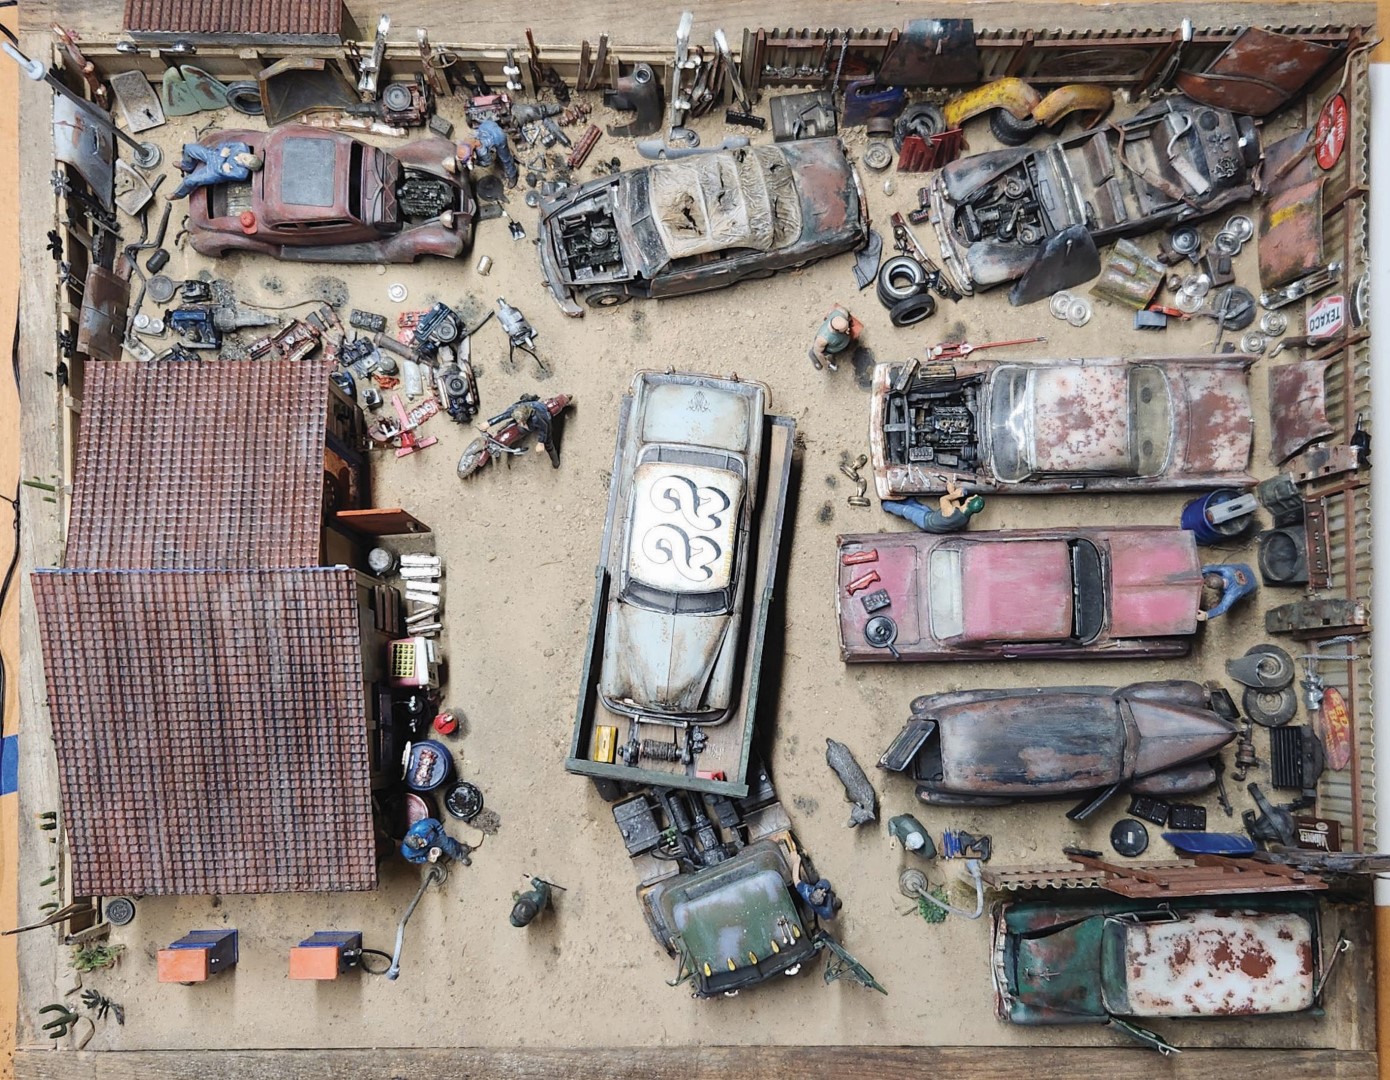
Route 93 northwest of Phoenix, Arizona, is one of those roads less traveled and takes you north, ending in Kingman Arizona. The small town of Wickenburg stands proudly and holds onto the pre-interstate highway days. This little town was the inspiration for Woody’s Auto Salvage Yard diorama. Old southwest buildings with terracotta roofs and businesses on main street still stand as if hoping for a re-birth of those days long past.
Woody’s Auto Salvage Yard depicts an average day at a late 1960s small town gas station and salvage yard. There are a few stories within the story throughout the diorama, but I want the viewer to see the stories and draw their own conclusions. A good diorama tells its own story and does not need a verbal explanation to the viewer, and Woody’s does just that!
THE BUILD:
Once I had the idea for the diorama, the first thing to consider was the layout of the structure and the yard in 1/25th scale. Avoiding symmetry was my first consideration, as I find a symmetrical layout to be predictable and boring. I knew I would include fences and the gas station structure but would need enough space to put in the cars and many parts one would find in a scrap yard. I concluded that 24×30 would be large enough to convey the idea I had in mind.
The base board is 3/8” finish plywood with a thin layer of drywall plaster. I applied a layer of Mod podge over the entire surface, then sifted a layer of dirt to create the dirt lot. I added larger rocks, as the Arizona landscape is not smooth. The structure is basswood, and balsa wood.
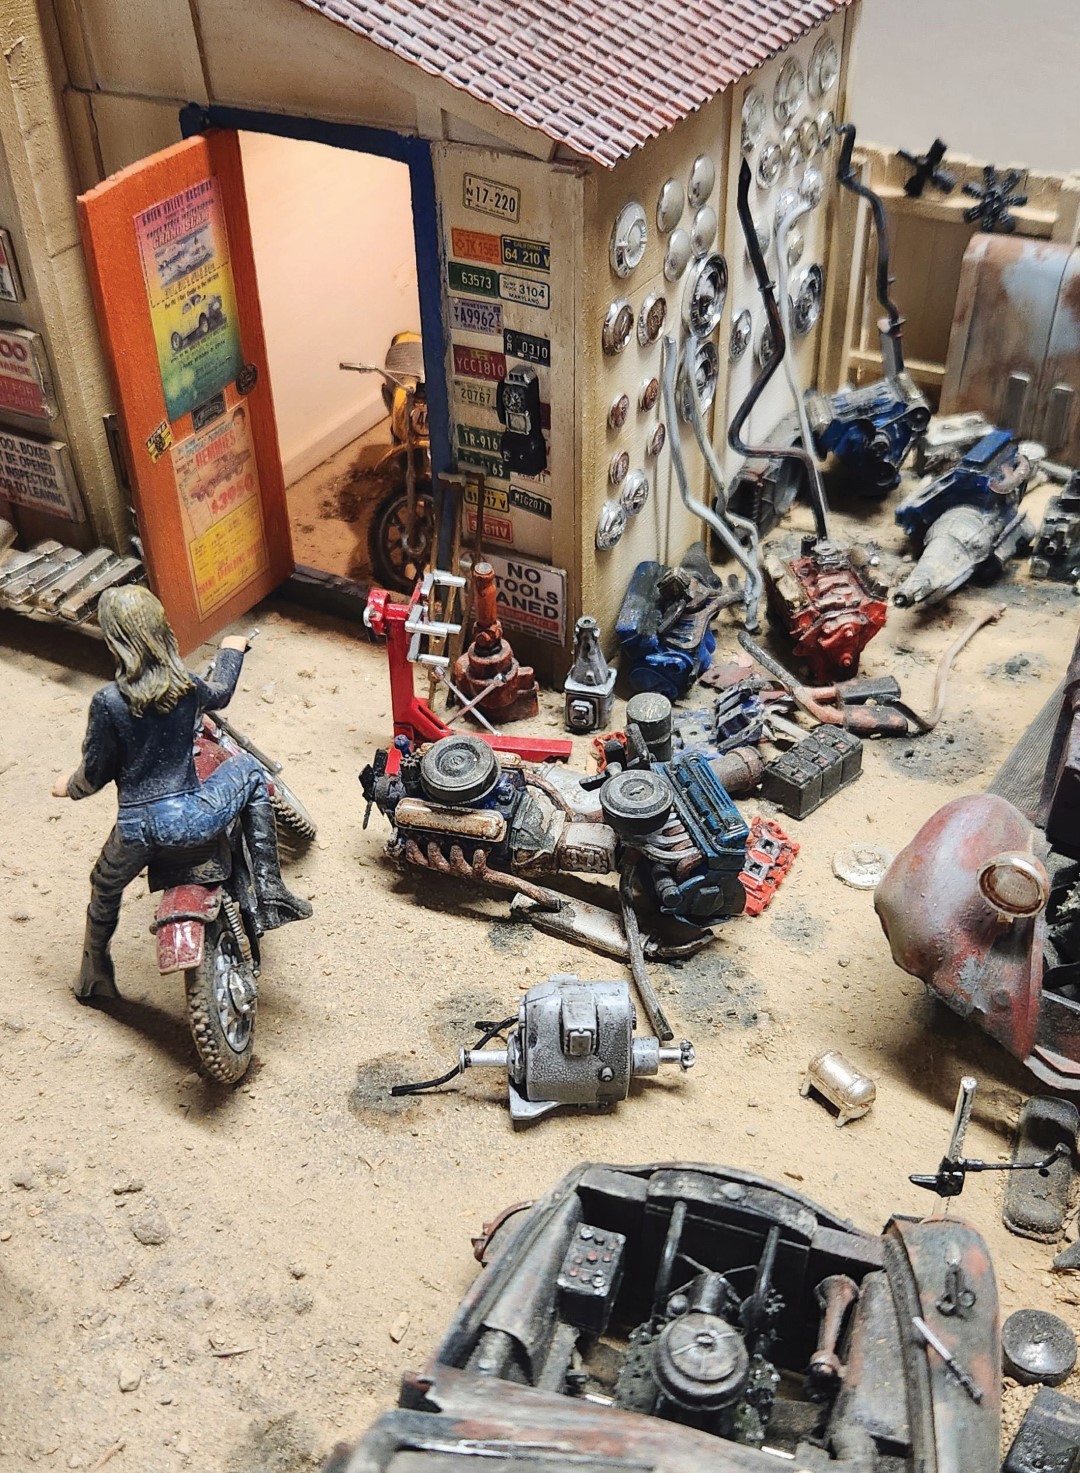
I used graph paper to layout the design and assure that all parts of the building were square. The roof is terracotta-look Plastruct plastic sheeting. Window glass is a photographic acetate clear material that is much thinner than clear styrene.
I pre-planned the wiring and lighting layout long before I could do any finishing work or place any model cars on the baseboard. I used Woodland Scenics Just-plug LED lighting. All of the lights are plugged individually into a control box and can be dimmed or brightened. The wires run under the baseboard and and come up through holes where I planned building and streetlights. With the lighting locations determined and finished first, the cars, parts and figures could be placed correctly without looking like an afterthought and sloppy. The fencing came next, as that would determine the perimeter of the yard. I used handmade basswood fencing and Plastruct styrene corrugated metal for that perimeter.
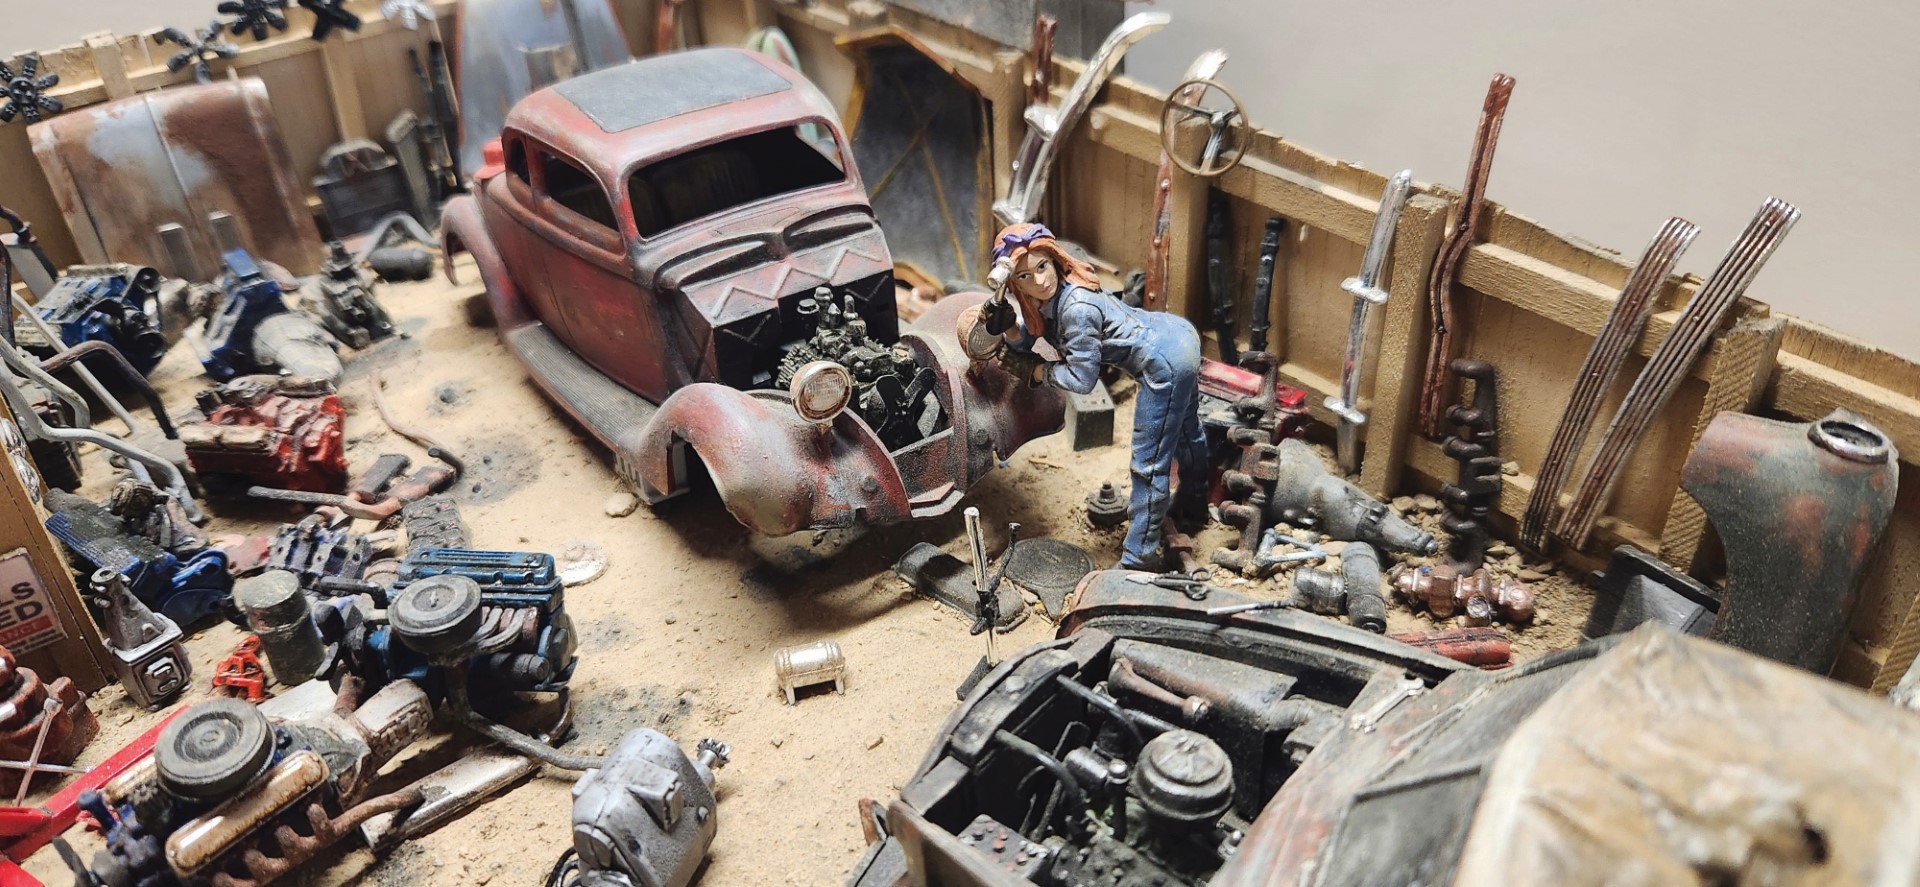
Now that the base salvage yard was completed, it was onto which cars, trucks and parts to add. Each of the following 1/25 scale kits, 14 in all, was built specifically for the diorama:
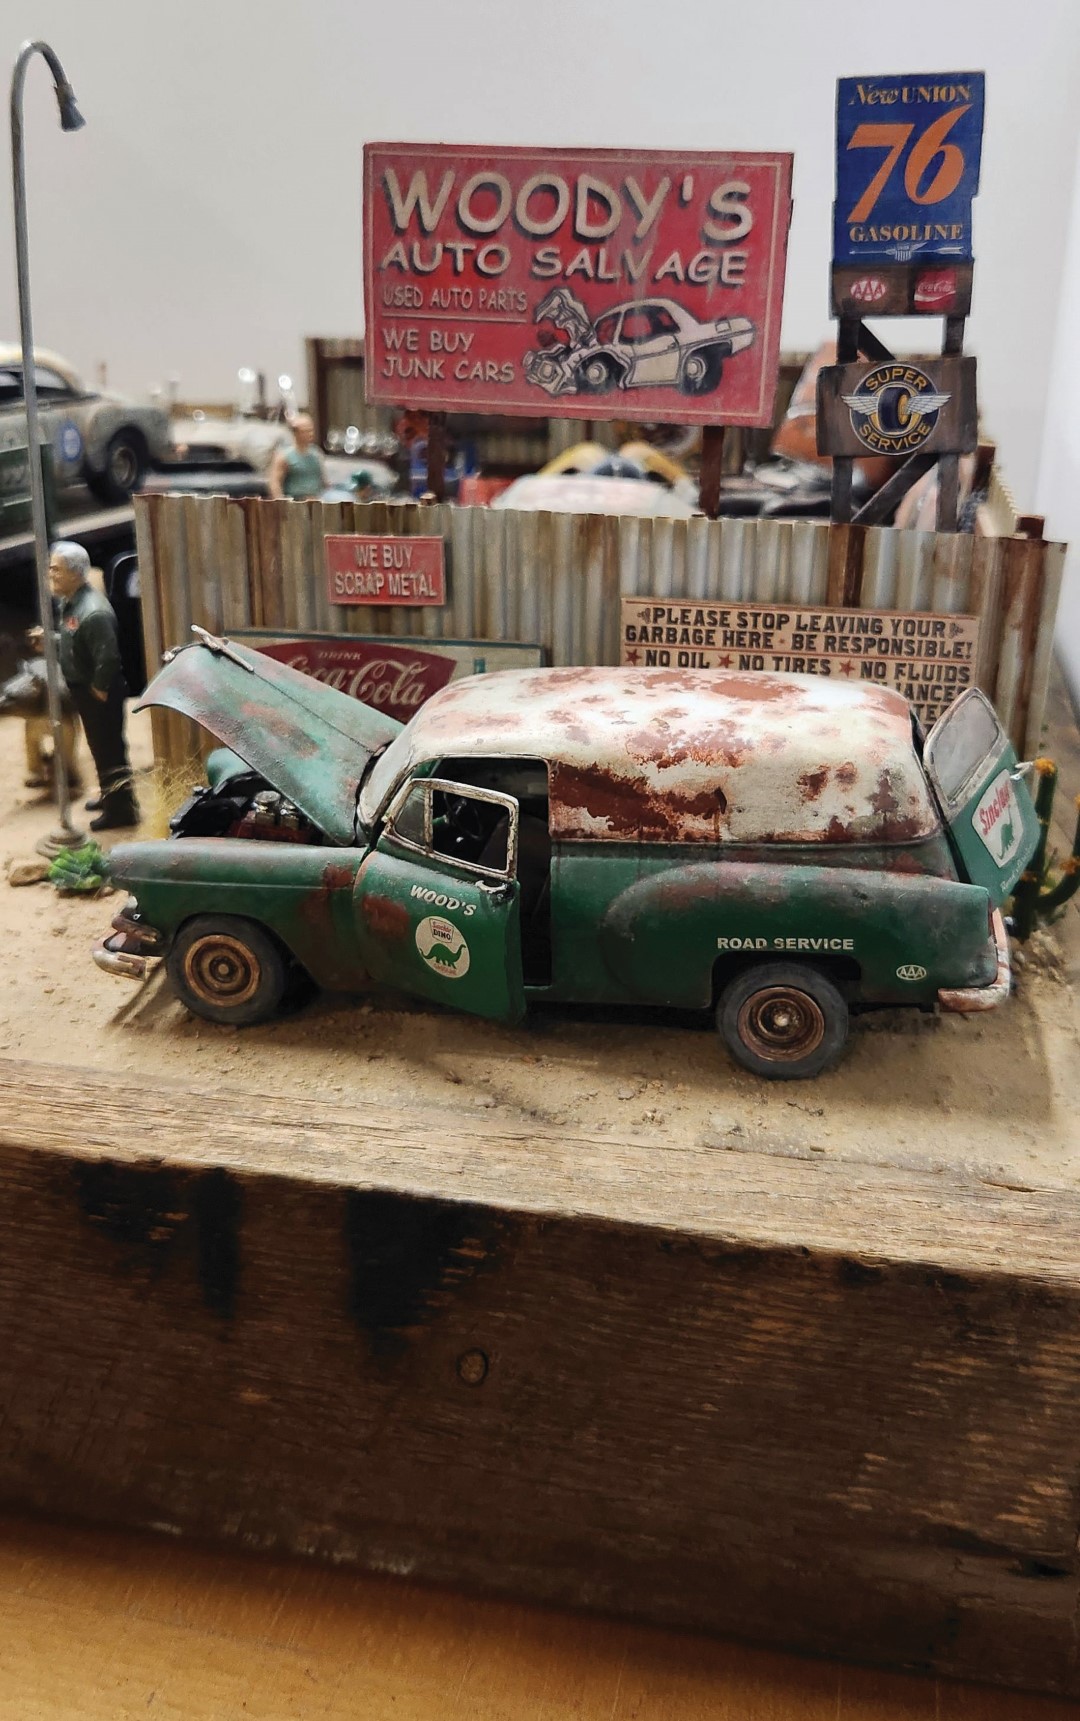
1953 Chevrolet Panel Delivery (Revell), 1940 Ford Sedan delivery (AMT), 1963 Dodge DL700 COE (Lindberg), 1953 Chevrolet Bel Air 2 door (AMT), 1962 Pontiac Catalina (AMT), 1957 Chrysler 300c (AMT), 1948 Lincoln Continental (Lindberg), 1950 Ford Convertible (AMT), 1932 Ford 5 window coupe (AMT), three enduro motorcycles (AMT), and two resin gas pumps. I used various miscellaneous parts from the AMT Tip Top Shop kit as well. The figures are from American Diorama.
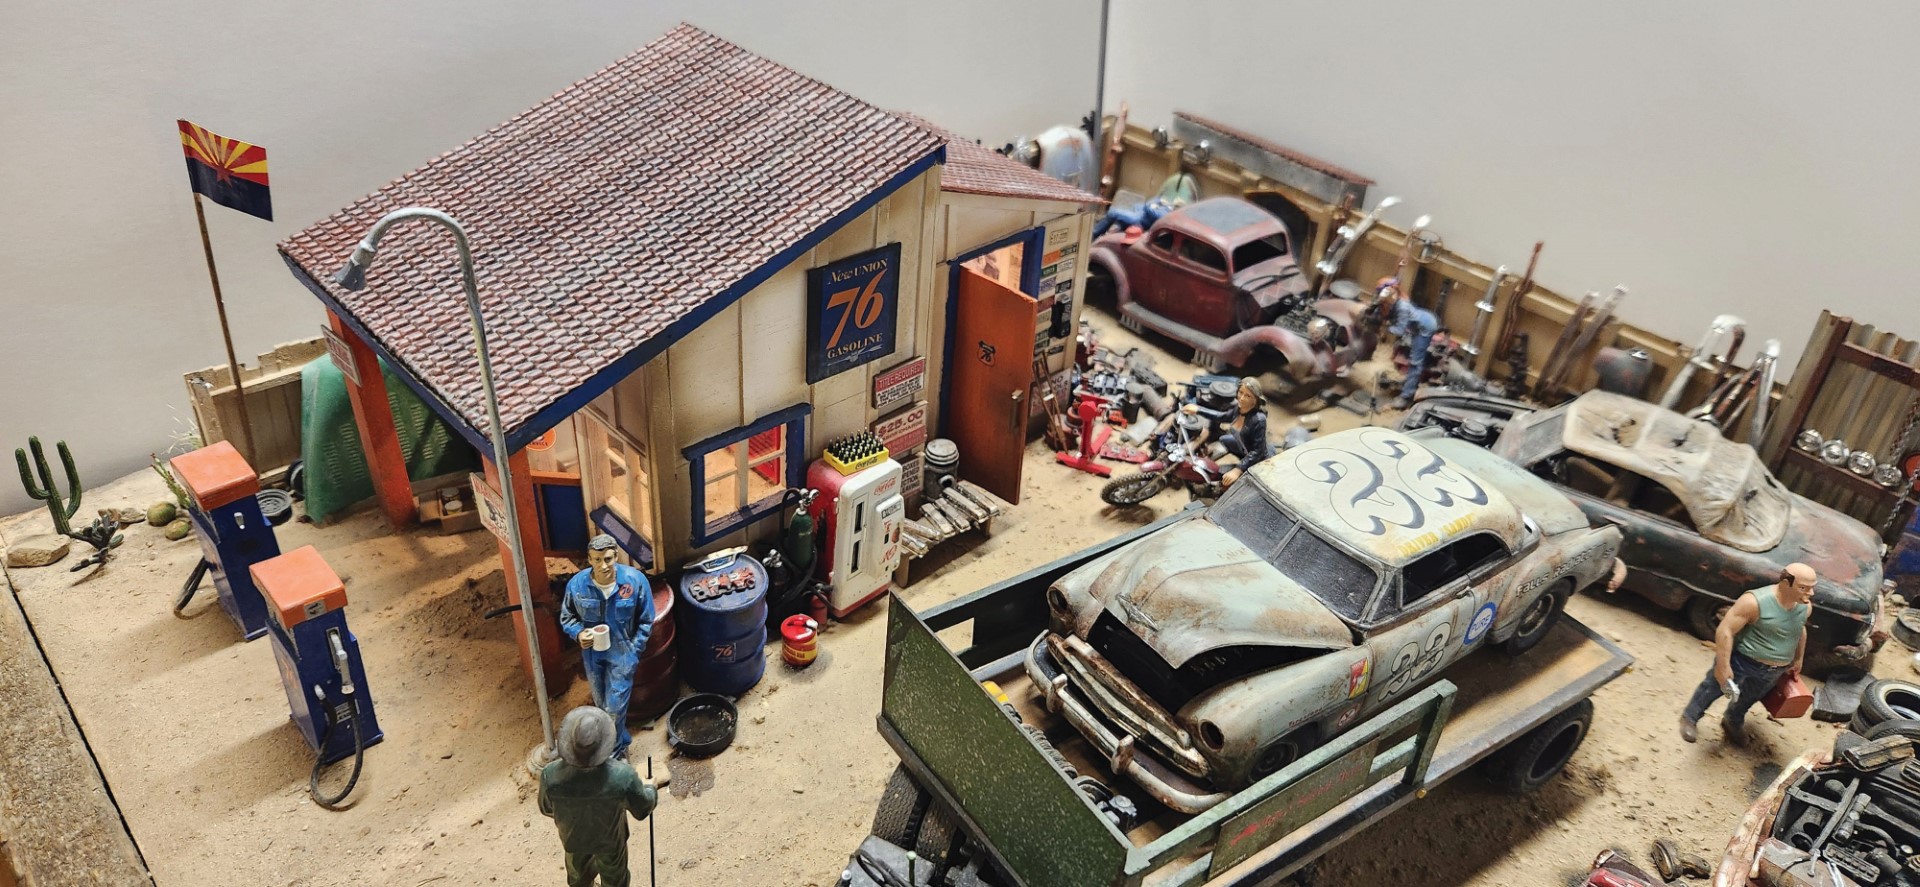
Keeping true to the idea, I made sure that all items were period correct to tell the story of the time frame of the late 1960s. Each car had to be weathered according to its age. I used various techniques from dry brushing to sanding existing paint to expose primer to using kosher salt and airbrush.
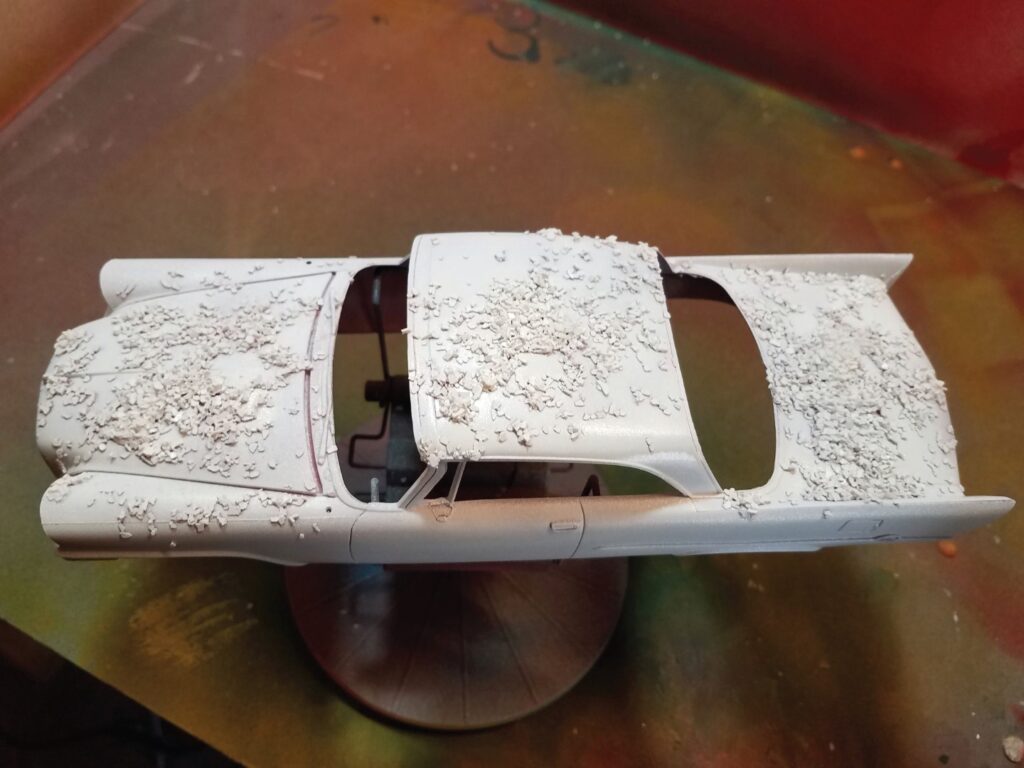
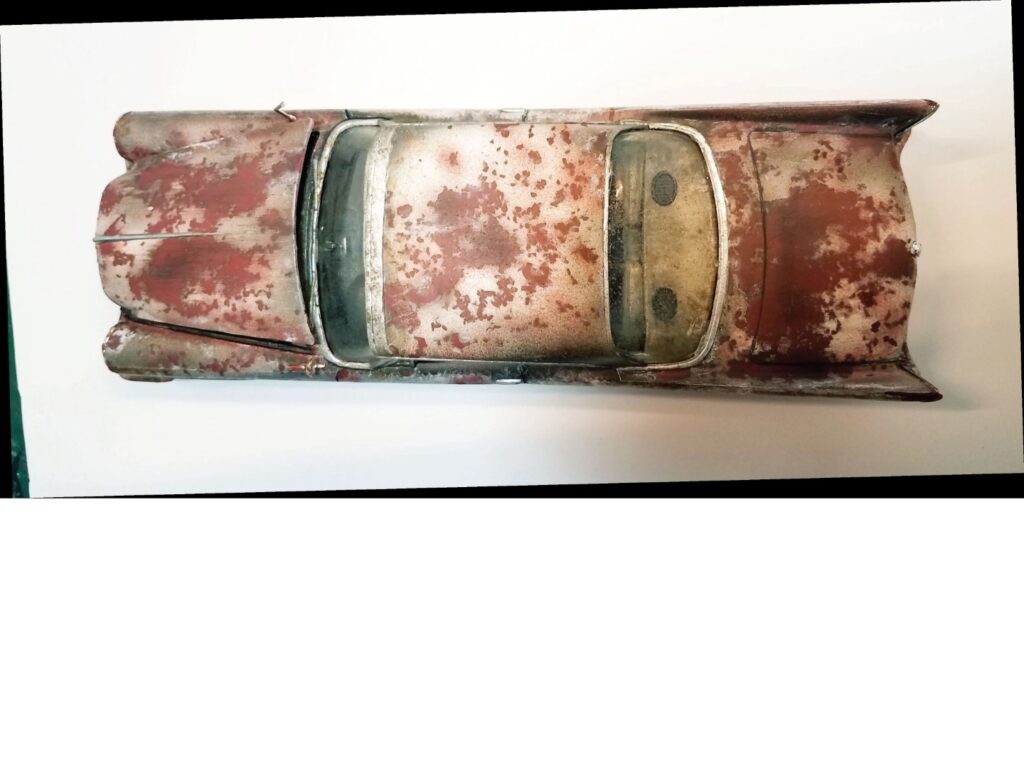
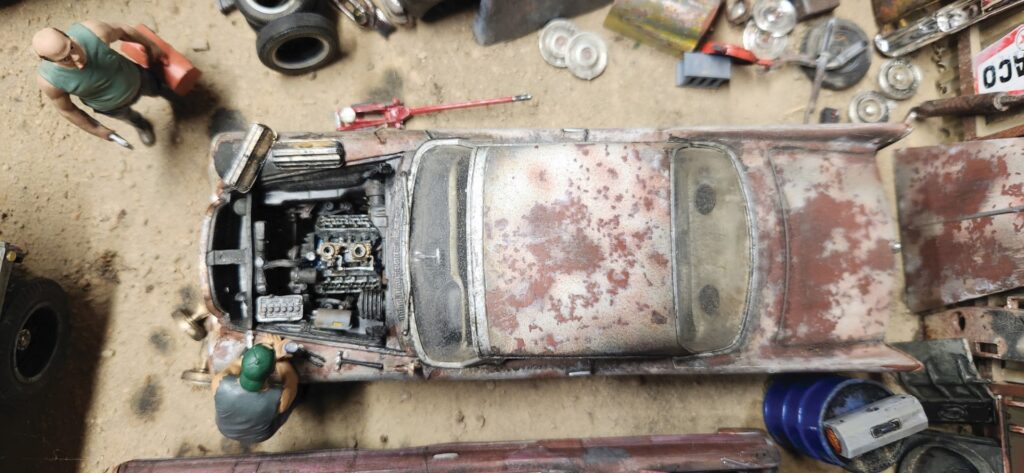
My favorite car is the Chrysler 300c. I used a red primer as an undercoat then applied water drops and sprinkled kosher salt on the body. Let the salt dry hard and then airbrush the color of your choosing. After letting the paint cure, I used an old toothbrush to remove the kosher salt, exposing the rust color underneath. I used some dry brushing and panel line accent black to give that worn-out look of a car left outdoors for many years.
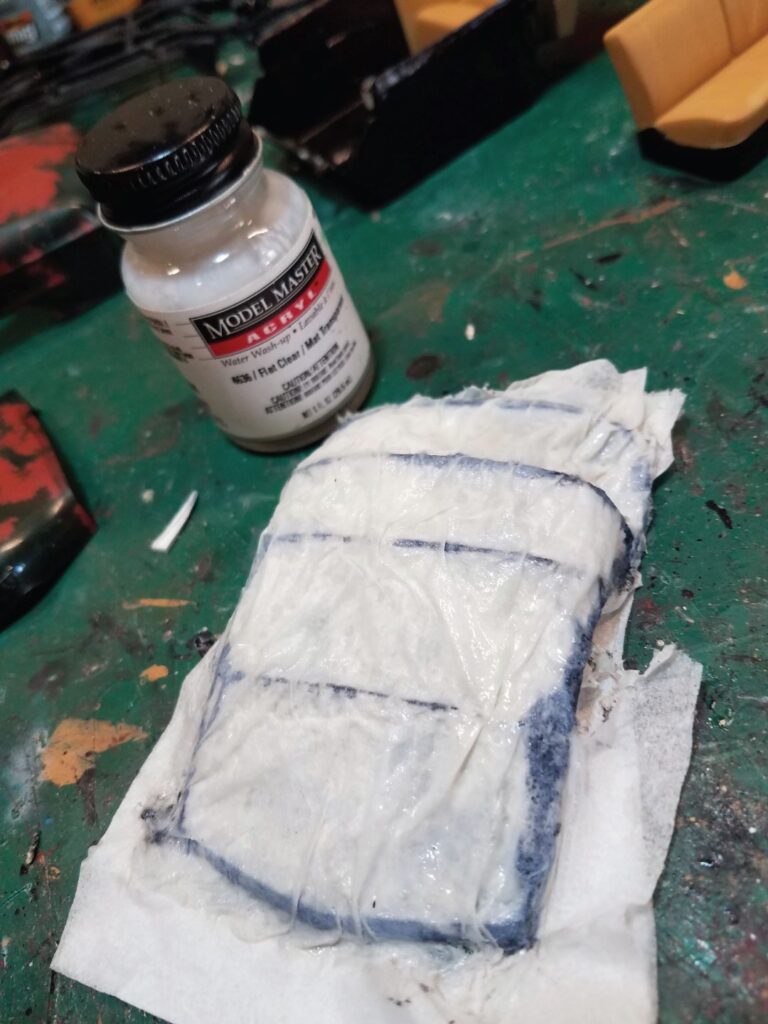
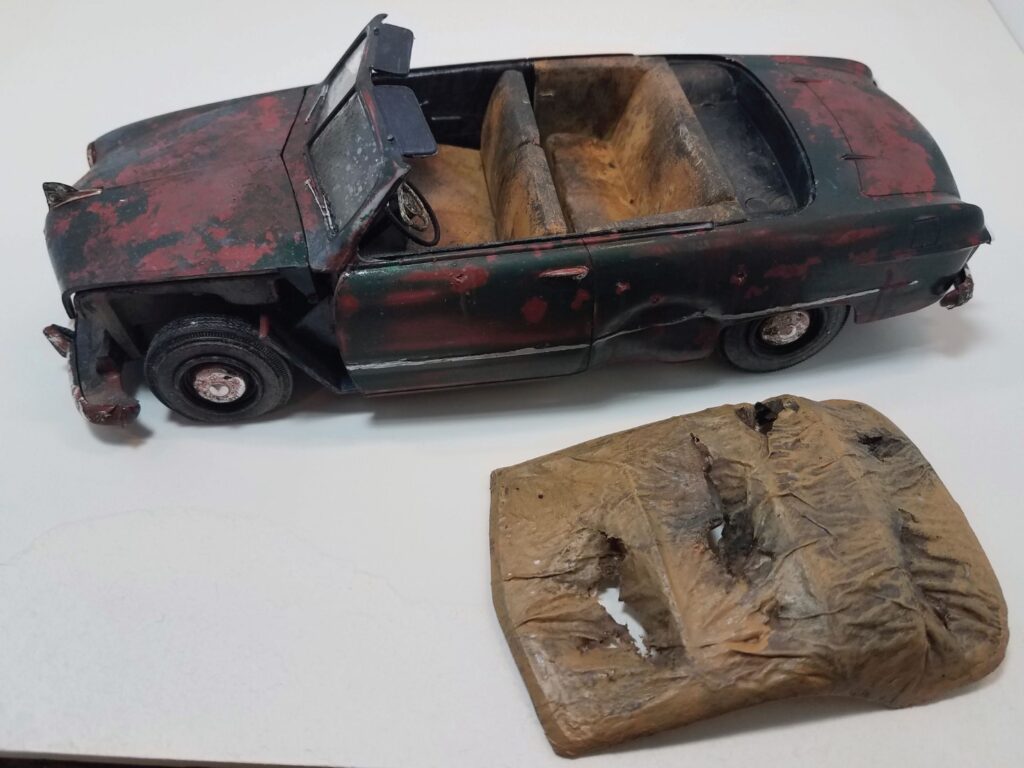
Another technique that was quite successful was the convertible top on the 1950 Ford. I cut the plastic convertible top to remove most of the plastic and leave only the spars. I then used Kleenex tissue as canvas roof material, carefully cutting holes to represent tears and sagging by applying gentle pressure while it was still wet. I used Testors acrylic flat finish on the tissue to create a worn, torn, sagging old convertible top. After it dried thoroughly, I painted and weathered the top.
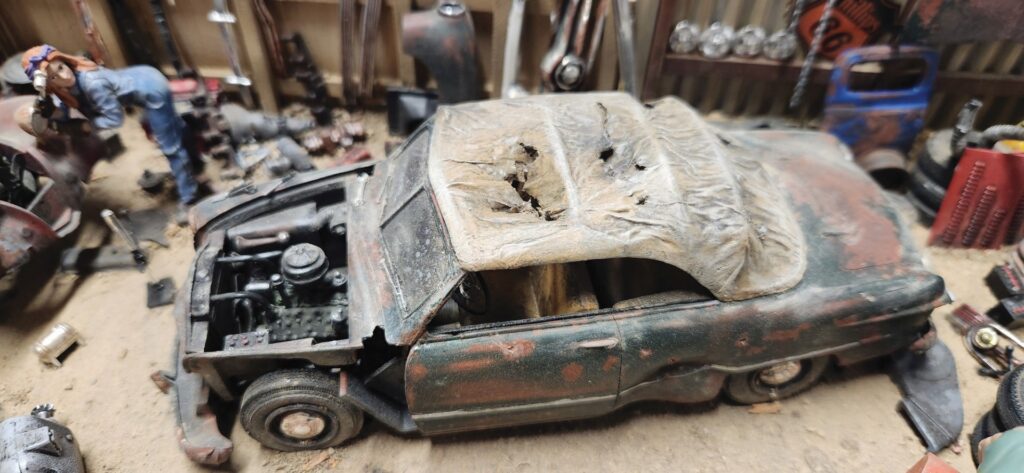
The diorama took shape as the vehicles were glued into their specific spots and parts were added around the edges. There are hundreds of parts and accessories on the diorama as well as inside the structure. There are oil stains on the ground throughout the yard in the dirt, as one would expect from the many cars that have come through the place. One can go on a visual scavenger hunt and find many interesting things, like a pair of crutches, a pay phone, unopened oil cans, engines, transmissions, hub caps, bumpers, a Mack truck radiator and wooden shipping pallets. Everything you would expect to find might just be there, including a guy sleeping on the job!
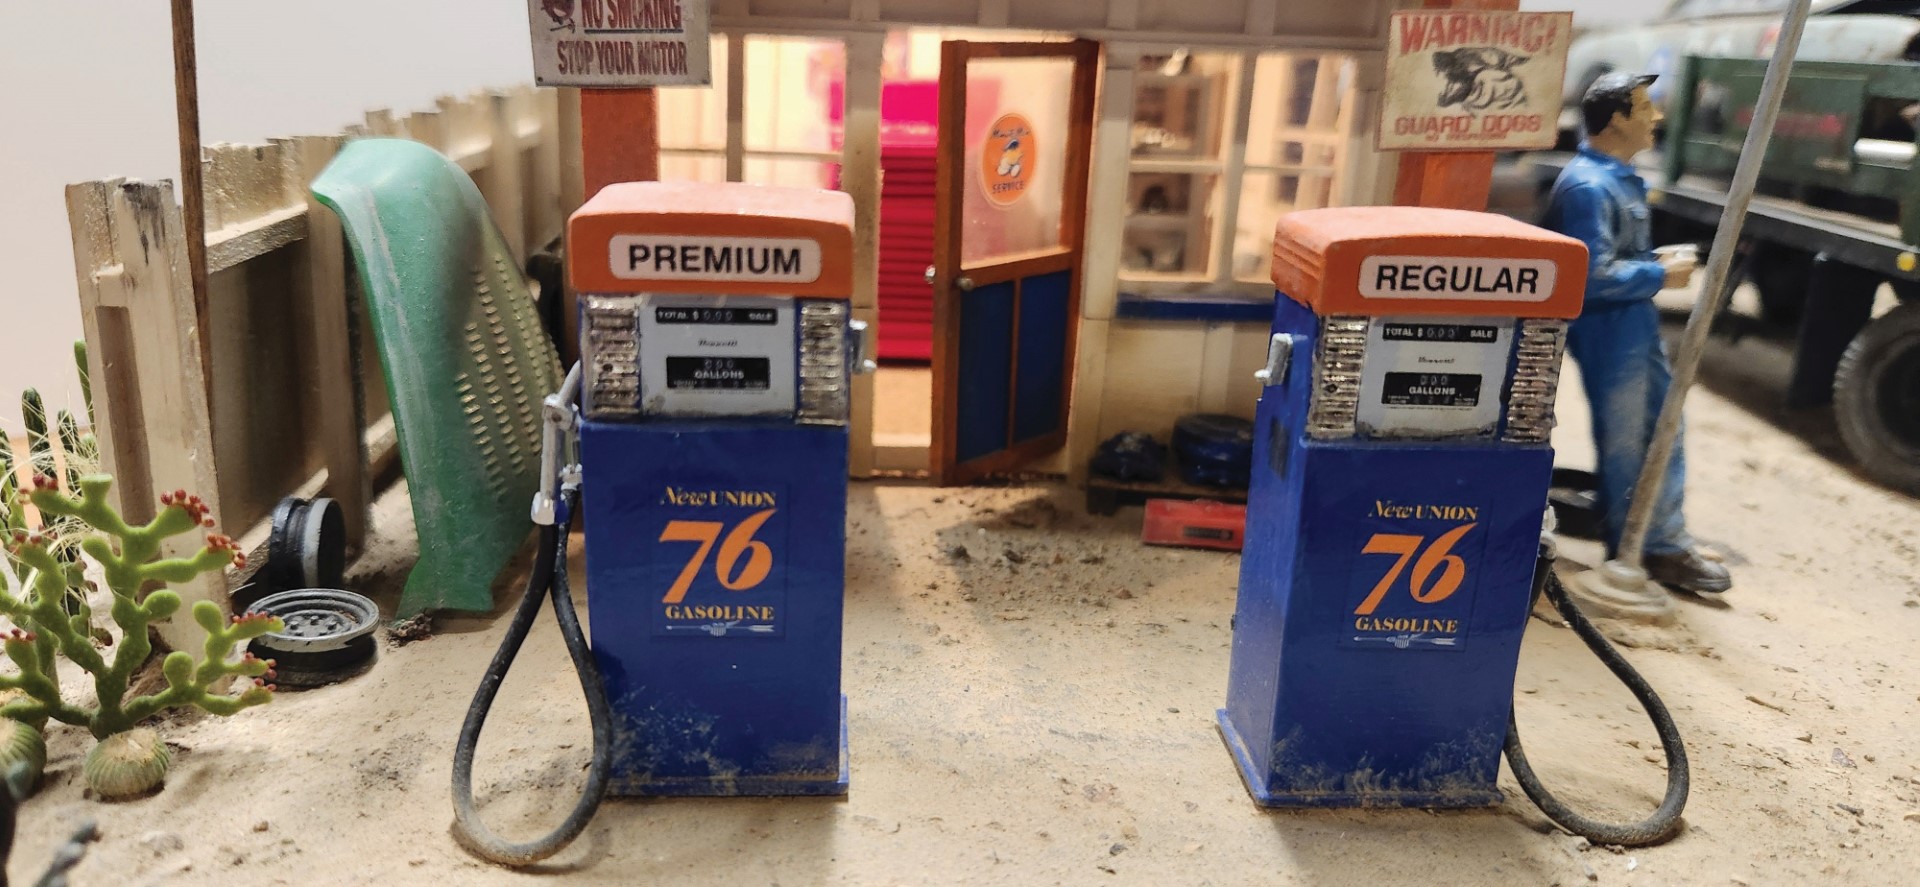
The finishing touches were as important as all the parts, figures and junked cars to solidify the story. Woody’s Auto Salvage Yard is in Arizona, so I added small cacti at the fence lines and an Arizona flag flying above the front of the 76 gas station. The build took more than two years to complete. There were times I thought it was done, but would find some other detail to add.
The base of the diorama is oak fence rail custom cut and beveled to hold the base of the finished diorama. Its rough look plays off the diorama itself with all its wear and tear.
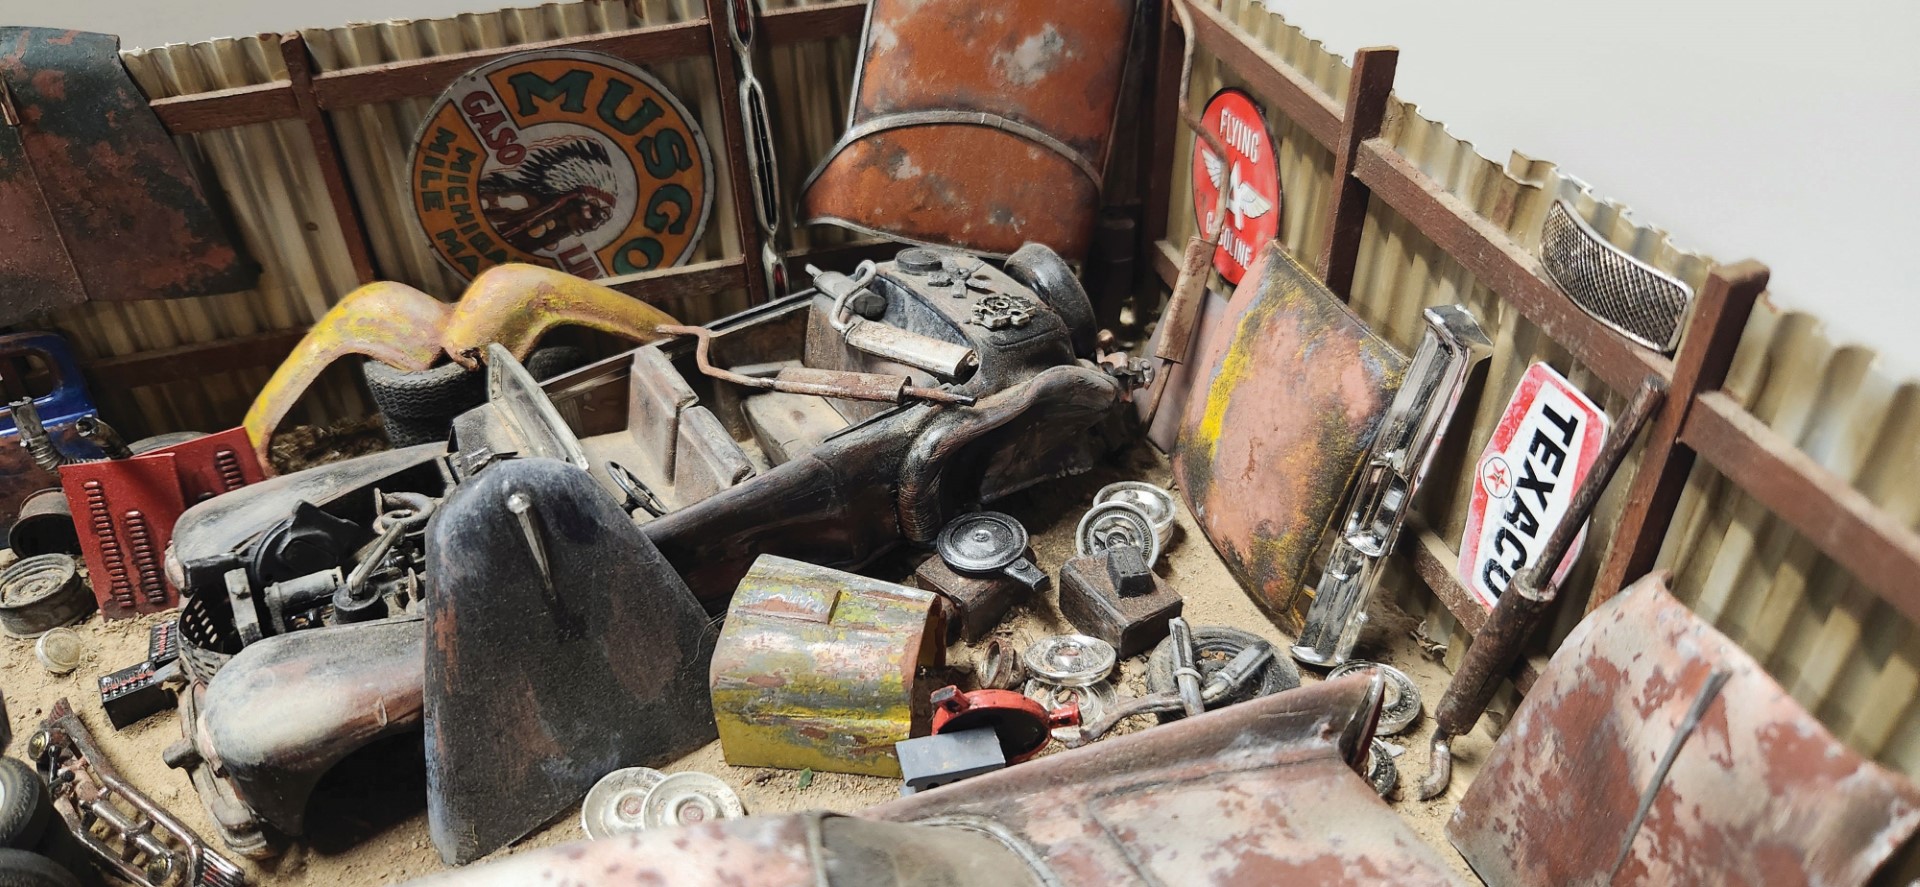
Woody’s Auto Salvage Yard has been a crowd favorite and has won numerous IPMS awards throughout the Mid Atlantic region and a major award at NNL East in 2024.

Meet Scott L. Saylor
Scott is a retired
photography/fine art teacher. He
started in the hobby as a boy, way
back in 1974. He took a hiatus in
2010, and returned to the hobby
in 2014. Scott is a club secretary
of the Shenandoah Valley Modelers
IPMS chapter. He primarily builds
1/25 big rig truck models and
dioramas. He mentors members new
to the hobby and shares his skills
and experiences with anyone in
need of assistance. Happy Modeling!

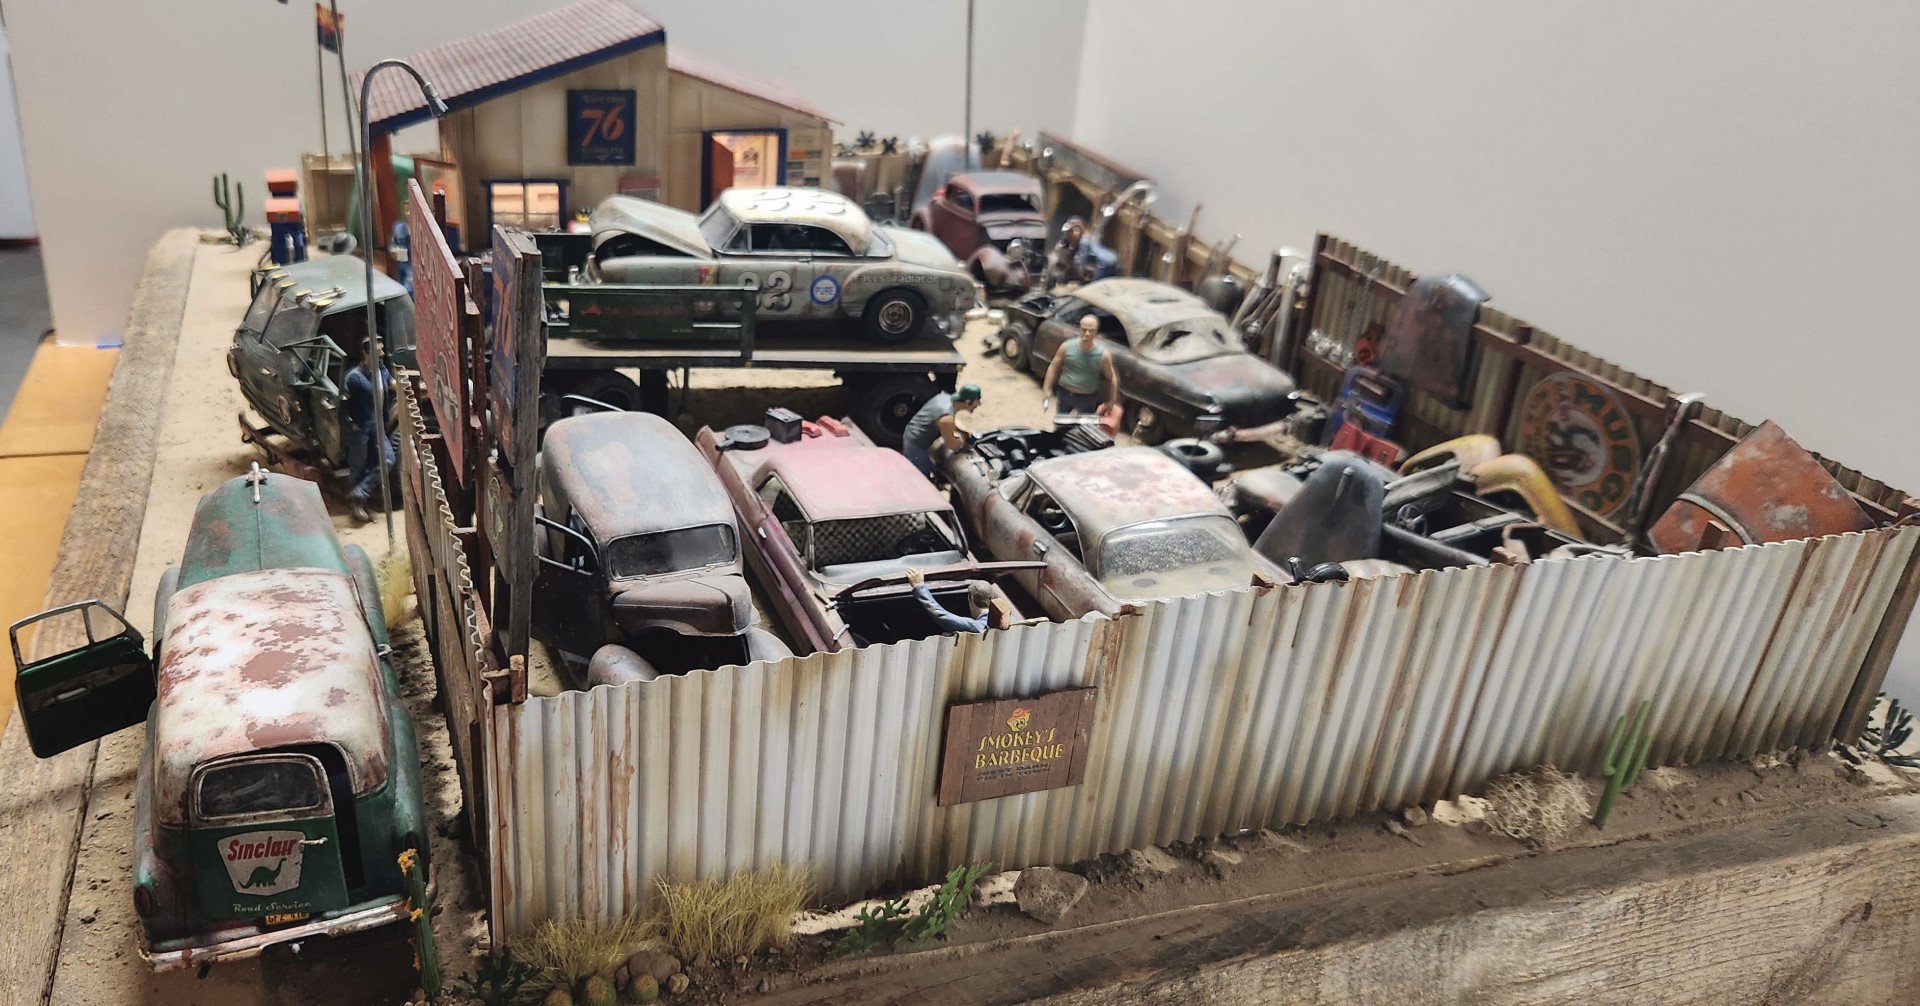
Super Modellbau, danke für diesen Bericht aus USA.
Really awesome, that’s a lot of work right there.
Good detail work, very impressive
[…] wo die ganze Bandbreite dieses Sets ausgenutzt werden kann. Ich verweise dazu gerne auf den Gastbeitrag auf unserer Seite von Scott L. […]